how to draw a part for 3d printer
Don't own a big 3D printer yet? When determining what's possible with a compact desktop 3D printer, think across the build book. Just equally assemblies such every bit your smartphone or even a road bridge consist of many individual building blocks, splitting a model into smaller parts that tin can exist combined later press is a not bad solution for 3D press big objects that don't fit on a build platform.
Splitting a office can also be the best way to get a loftier-quality result, even if the whole part could fit into a unmarried build. This is the case when multiple or opposing surfaces demand to be free of support marks, a design has complex overhangs, or a model contains cavities that would trap the liquid resin inside.
3D printing multiple pieces also opens up new opportunities, such every bit creating multi-material assemblies or combining rigid and flexible 3D printed parts to simulate overmolding.
When selecting a bonding method, your primary consideration should exist the strength of the bonded joints, which is dependent on the ultimate use case of the parts:
-
Chemic fastening: Utilise a bonding agent for art, scale models, and complex shapes that are not meant for functional use and to sustain impact.
-
Mechanical fastening: Add screw thread or pockets to functional engineering parts that crave a robust mechanical connection or if y'all demand to repeatedly adhere and detach components.
This guide will focus on creating large multi-piece stereolithography (SLA) 3D printed models using chemical fastening. Read on for a step-past-step walk through the process, from splitting your model to mail-processing for a professional person finish.
In that location are two methods we recommend for splitting models: Add features to your design that volition allow the prints to marshal themselves, or simply split the parts with direct cuts, requiring y'all to align them during the fastening process.
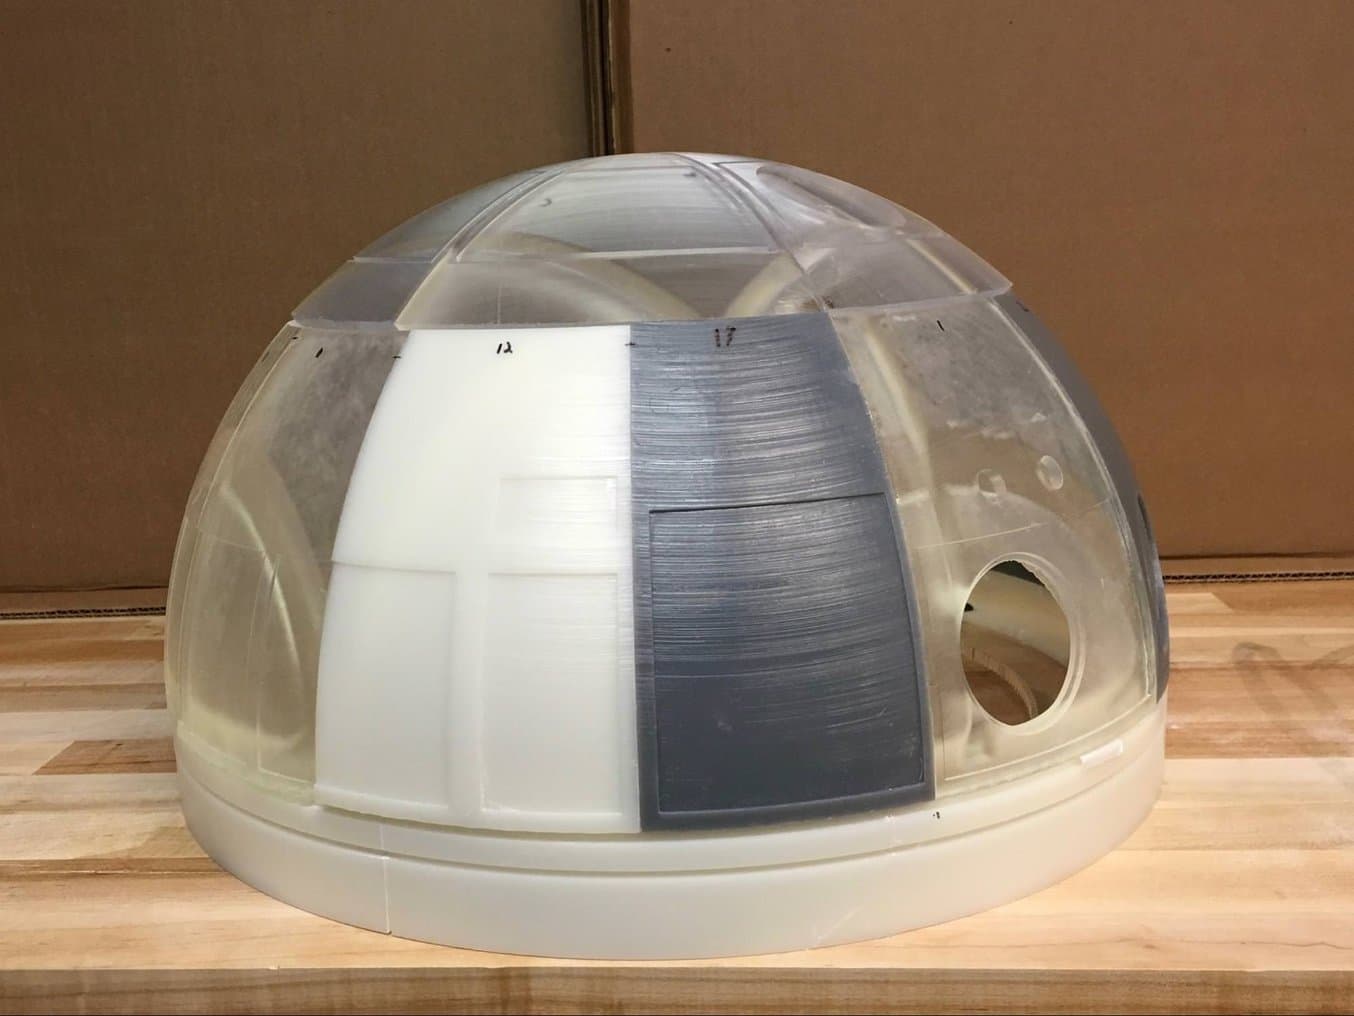
Regardless of which method y'all cull, if y'all have a large number of parts it's also a adept idea to add a unique identifier (letters, numbers) to each role to aid you solve the puzzle during assembly.
Employ the CAD tool of your preference to split your 3D model and add basic aligners like slots, pins, grooves, recesses, and lips or more complex aligners similar dovetails and cuts that follow existing creases in the model.
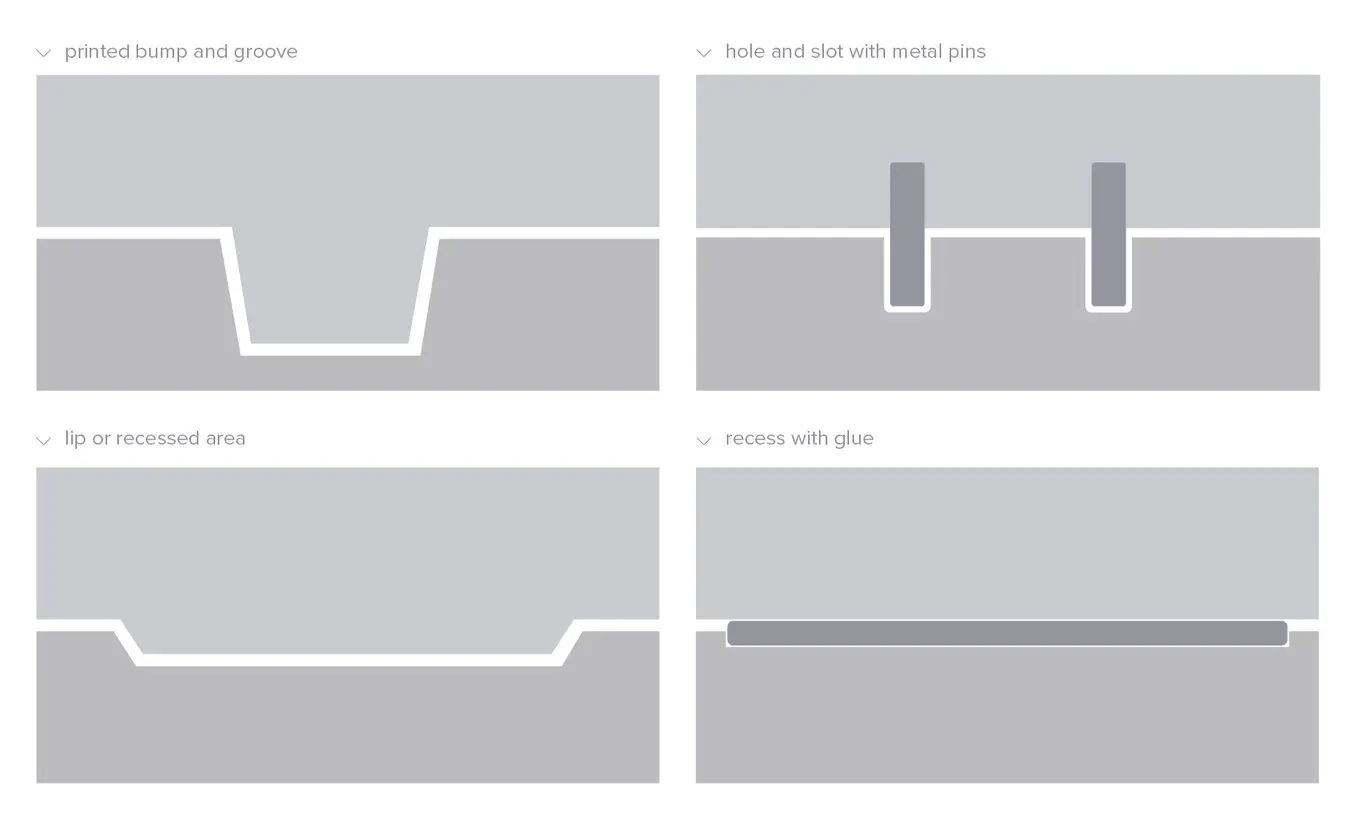
Adding aligners to a blueprint tin help when it comes to assembling parts.
In a perfect world these aligners make it unproblematic to align and assemble your parts, simply tin lead to issues when they turn out even slightly dissimilar from your 3D models and don't line upward perfectly. Consequently, only use aligners if your printer can print dimensionally accurate parts that are unlikely to warp.
Splitting your 3D model along straight lines is less design-intensive than adding aligners. Direct cuts are also more forgiving when prints plough out slightly warped or have generally a higher degree of dimensional variation.
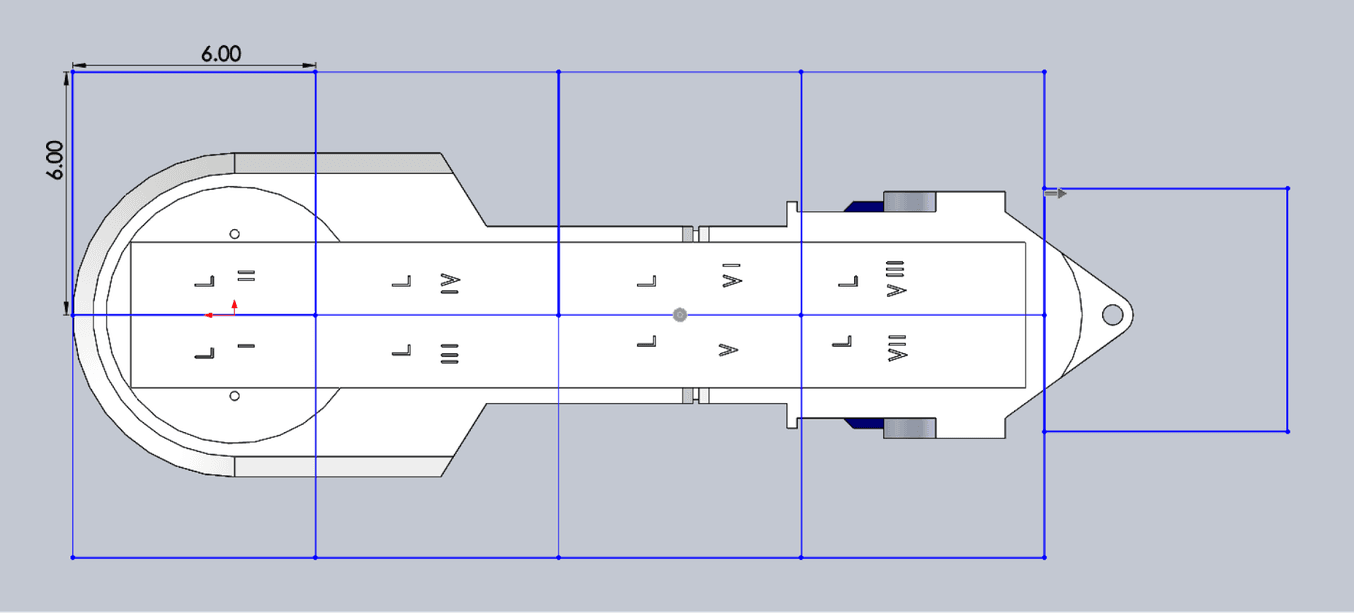
Adding identifiers to each part helps you solve the puzzle during assembly.
On the downside, directly cuts tin exist fourth dimension intensive when it comes to associates, every bit you accept to manually align each office and make sure they remain in the correct position until the adhesive fully bonds them.
By default, the stereolithography (SLA) 3D printing process creates fully dense parts. Depending on your design, this might not be a requirement when 3D printing large objects. In such cases, 3D printing the outer shell or hollowing out your blueprint are corking ways to save a considerable amount of fabric and time. When printing hollow models with an SLA 3D printer, be sure to add venting holes to avoid creating pressure volumes with air and resin.
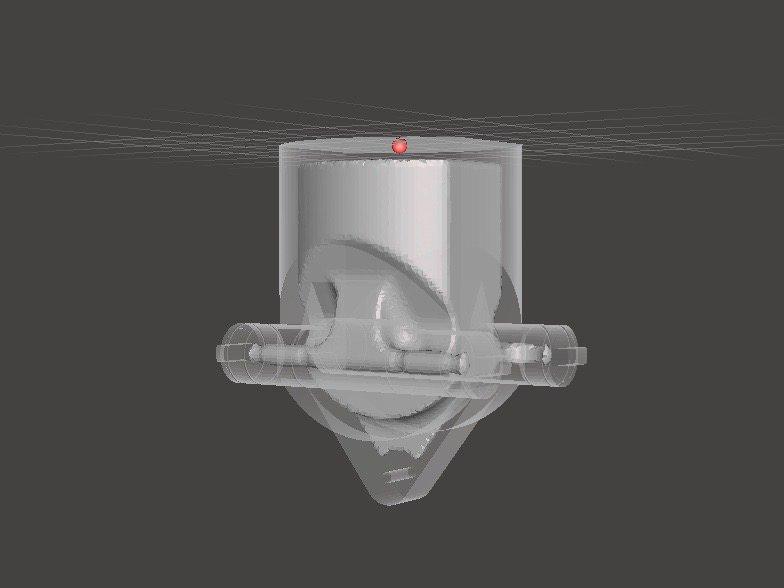
Hollowing out your model can relieve substantial fourth dimension and material, as the printer volition only need to print the outer shell.
Find out more on how to salve fabric and fourth dimension by hollowing out your 3D models.
We recommend three methods for bonding parts, depending on their size and ultimate apply case:
| Epoxy (5-30 minute) | Cyanoacrylate (CA, Super Glue) | Resin | |
|---|---|---|---|
| Surface area to bail | Large | Small/Medium | Pocket-size |
| Paintable | Yep | Yes | Yes |
| Bear on strength | Medium | Depression | Depression |
For the largest parts and the strongest adhesion, utilize v-30 minute epoxy. It has the longest work time, which helps when adjusting the position of larger 3D printed parts, but also leads to an overall slower associates process. Most 5-minute epoxies won't alter shape afterward almost five minutes and attain approximately 75 percent cure strength in less than an 60 minutes.
For the largest parts and the strongest adhesion we recommend epoxy.
The next choice is cyanoacrylate (CA, or Super Glue), which creates a quick, reasonably potent bail making ideal for small- and medium-sized parts. Clean the part thoroughly before applying it to the surface, as CA does not bail dirty surfaces well. CA has moderate impact strength, but is not recommended for high-impact applications.
For smaller prints you lot tin likewise simply use the liquid resin from your SLA 3D printer. Cascade a small-scale amount of resin into a tray from the canteen or cartridge, utilize a dropper or syringe to pick it up, and place it onto the surface to bail. Bring together the parts and wipe off any excess resin that might spill out around the edges. To solidify the resin and bond the parts, use a 5mw UV laser lite pen (405nm wavelength) and direct it to the bonding area around the parts.
This method will create a chemical bond, just as if the part was printed on your SLA 3D printer, but is only applicable to small bonding surfaces as the low power light pen cannot penetrate the model deep enough to create a strong bond.
Note: When dealing with resins, brand sure to vesture protective equipment including appropriate middle protection and gloves.
Now that you're finished assembling your model, the final stride is post-processing. This pace consists of geometric correction of the part to ensure it has an even surface true to your original 3D model and artful terminate to go a consistent painted surface.
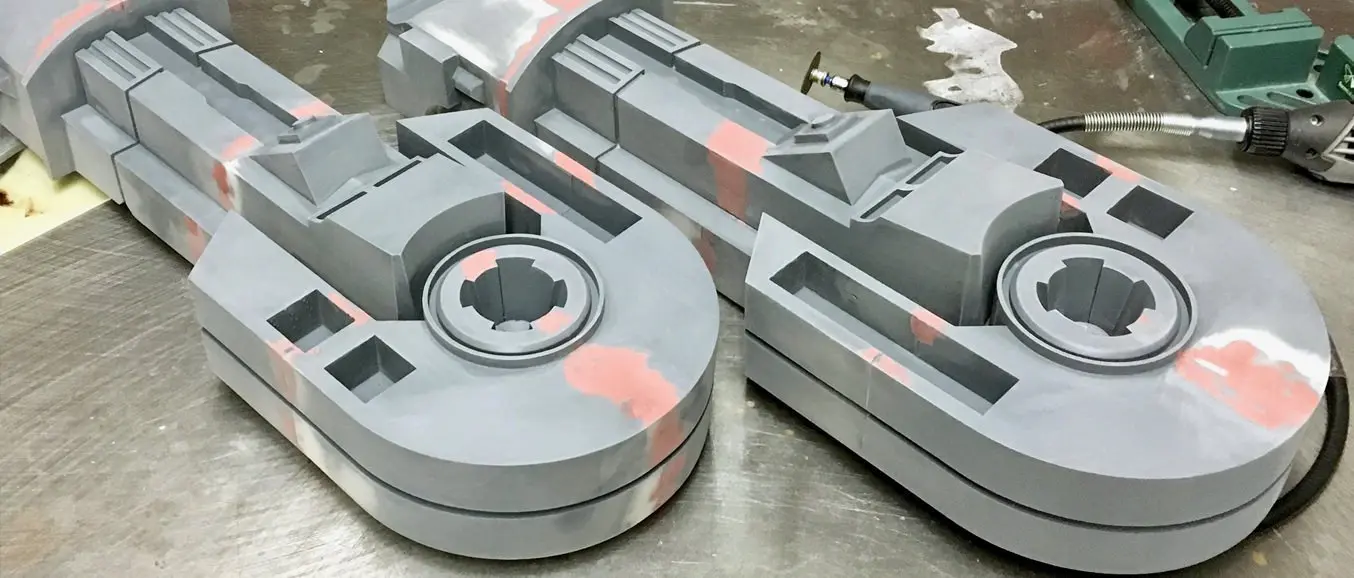
Depending on the accuracy of your printer and the size of the printed parts, it's almost inevitable to take slight voids or incorrections where the parts run into. Automotive putty (such as Bondo 907) sticks to the resin well and should be applied to the surface in thin layers to patch these inaccuracies. Alternatively, utilise resin to fill the seams and cure information technology using a UV pen. Sand lightly after each layer dries to help bring the part towards its final grade.
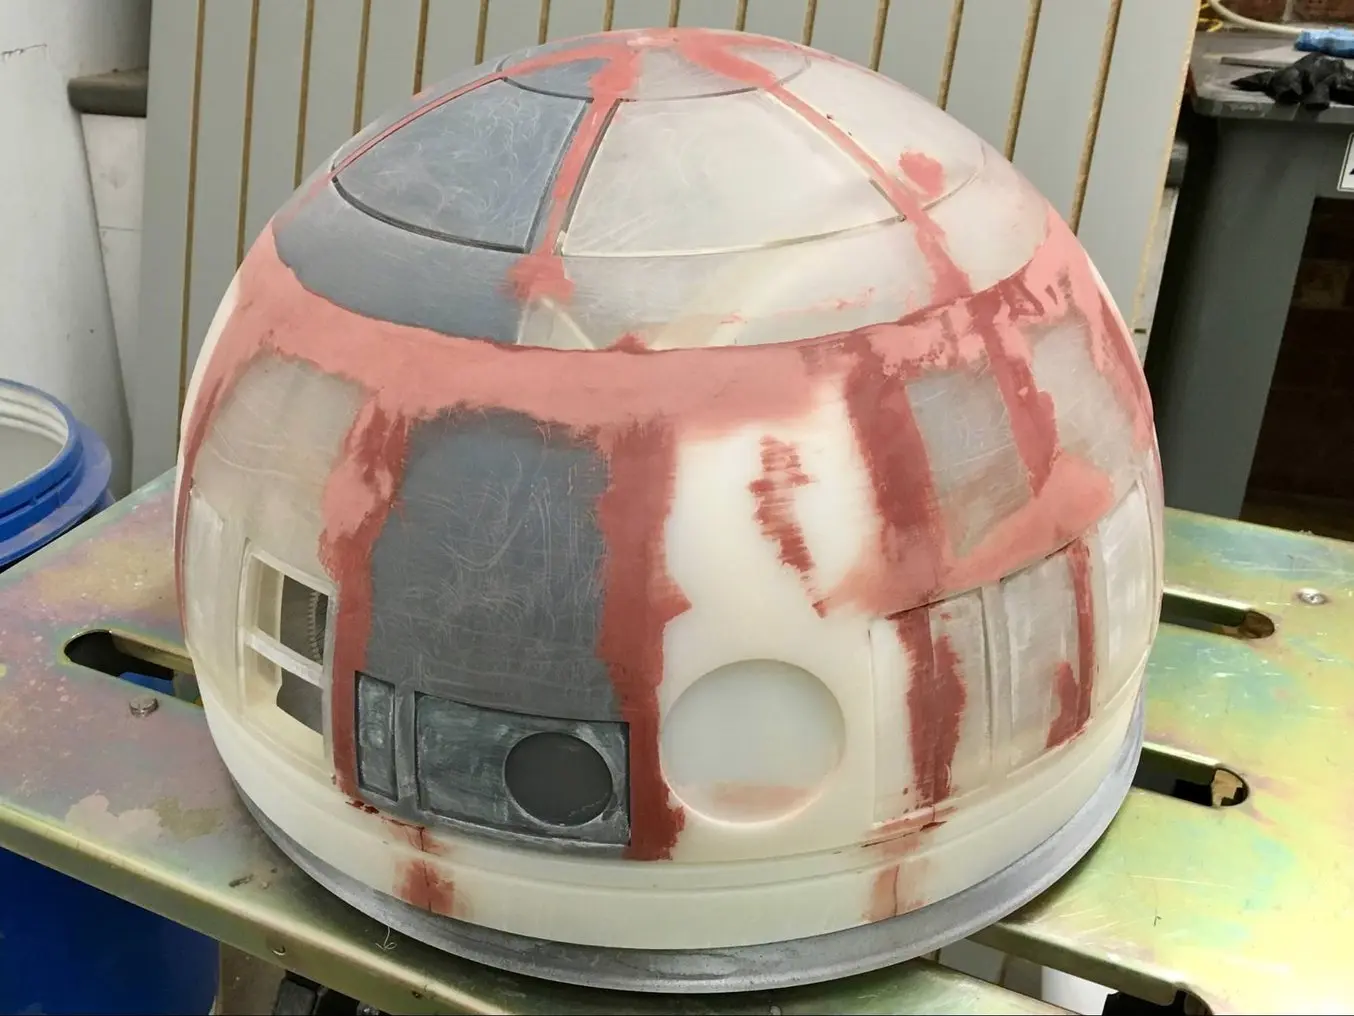
Patching parts with automotive putty (ruddy surface area on the prototype) will help you mend slight voids or incorrections in between parts.
Sanding will help you remove support marks and any remaining inaccuracies from your model. Start with carefully dry sanding the surface using ~150 dust sandpaper to remove large support marks and level the edges where parts meet. Once the role's surface is even, wet sand it with ~320 grit sandpaper to remove all remaining layer lines. Move the sandpaper in a random motion to avert creating a grain. In most cases these two steps will create a smooth enough cease, simply you might continue increasing the sandpaper grit count by a factor of ~ii and wet sand the entire office until the surface reaches the desired smoothness.
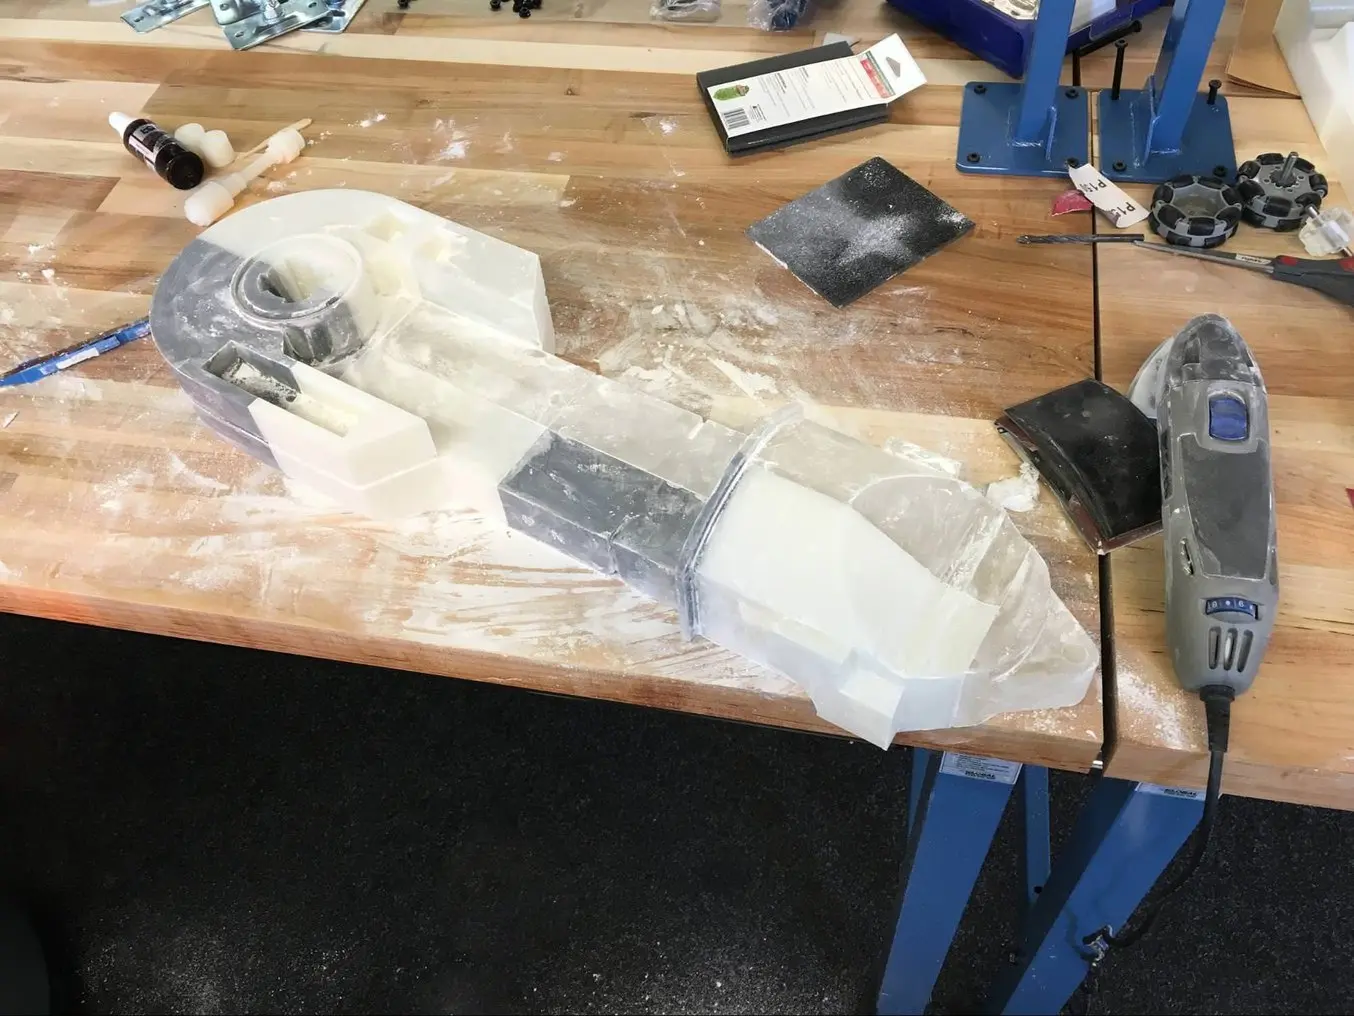
Power sanding works best on large apartment surfaces, but can hands destroy pocket-size features. For smaller parts we recommend manual sanding, for larger ones a combination of transmission and power sanding.
For larger parts, a combination of power and transmission sanding tin salve you considerable time. Power sanding works best on large flat surfaces, but tin easily destroy small features, sharp corners, and the subtle contours characteristic of SLA printing. Power sanding also creates a lot of dust, so brand certain to prepare the surrounding expanse.
Note: Power tools require your full attention and wearing protective equipment. It is very easy to get out the sander stationary and quickly article of clothing down that area without realizing it.
Once you're finished sanding your model, rinse it in soapy h2o to remove any dust or debris and dry it thoroughly before moving onto the last step.
Priming ensures paint adhesion to the surface and can alert you to where you may need to sand more than or trim support marks you lot may have missed. Generic plastic primer in matte grey shows details exceptionally well—employ it to the surface in several thin coats for the all-time results. Continue sanding on disquisitional areas, utilize a lite coat of primer once more, and repeat this process until the total role has an fifty-fifty surface.
Note: When priming and painting, clothing protective equipment including a respirator designed for paint fumes.
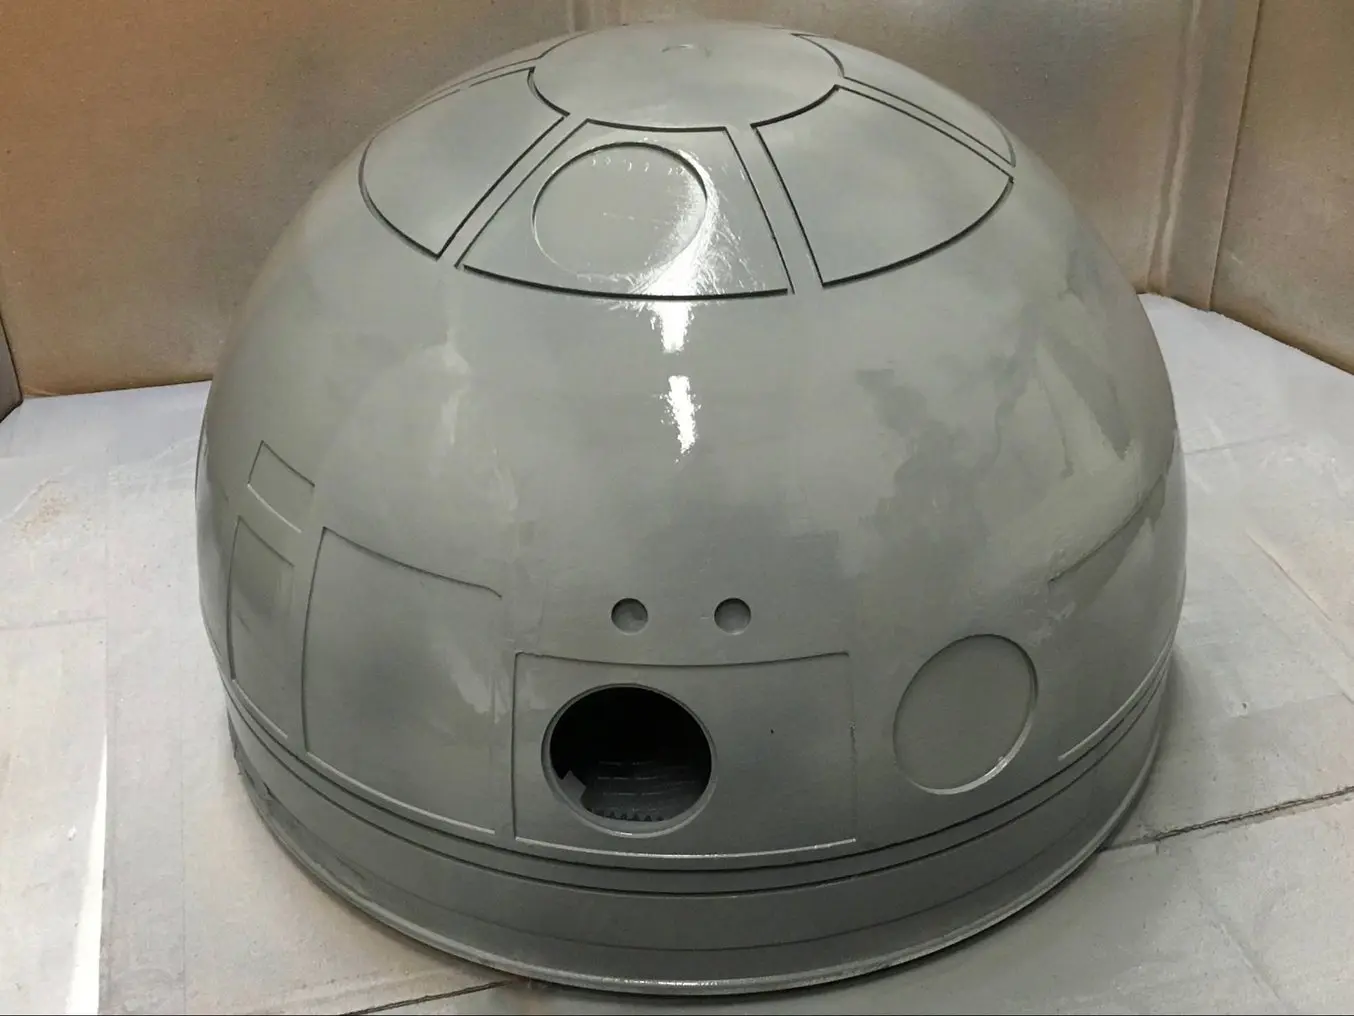
Generic grey primer shows details exceptionally well and will assist y'all uncover spots where additional sanding is required.
Discover out more than virtually sanding and priming from our extended guide.
For a finish with multiple colors, you'll need to mask your model. First, plan the order in which you volition pigment your model depending on the color, opacity, and size of the area that volition accept the specific colour. Start with the smaller parts then you'll need to cover less when painting the bulk of the area with the principal color. Use painter's tape for covering the edges and corners, and sheets of paper to embrace larger sections faster. Tape guides (lasercut) tin also be helpful to create make clean lines, circles, and circuitous shapes.
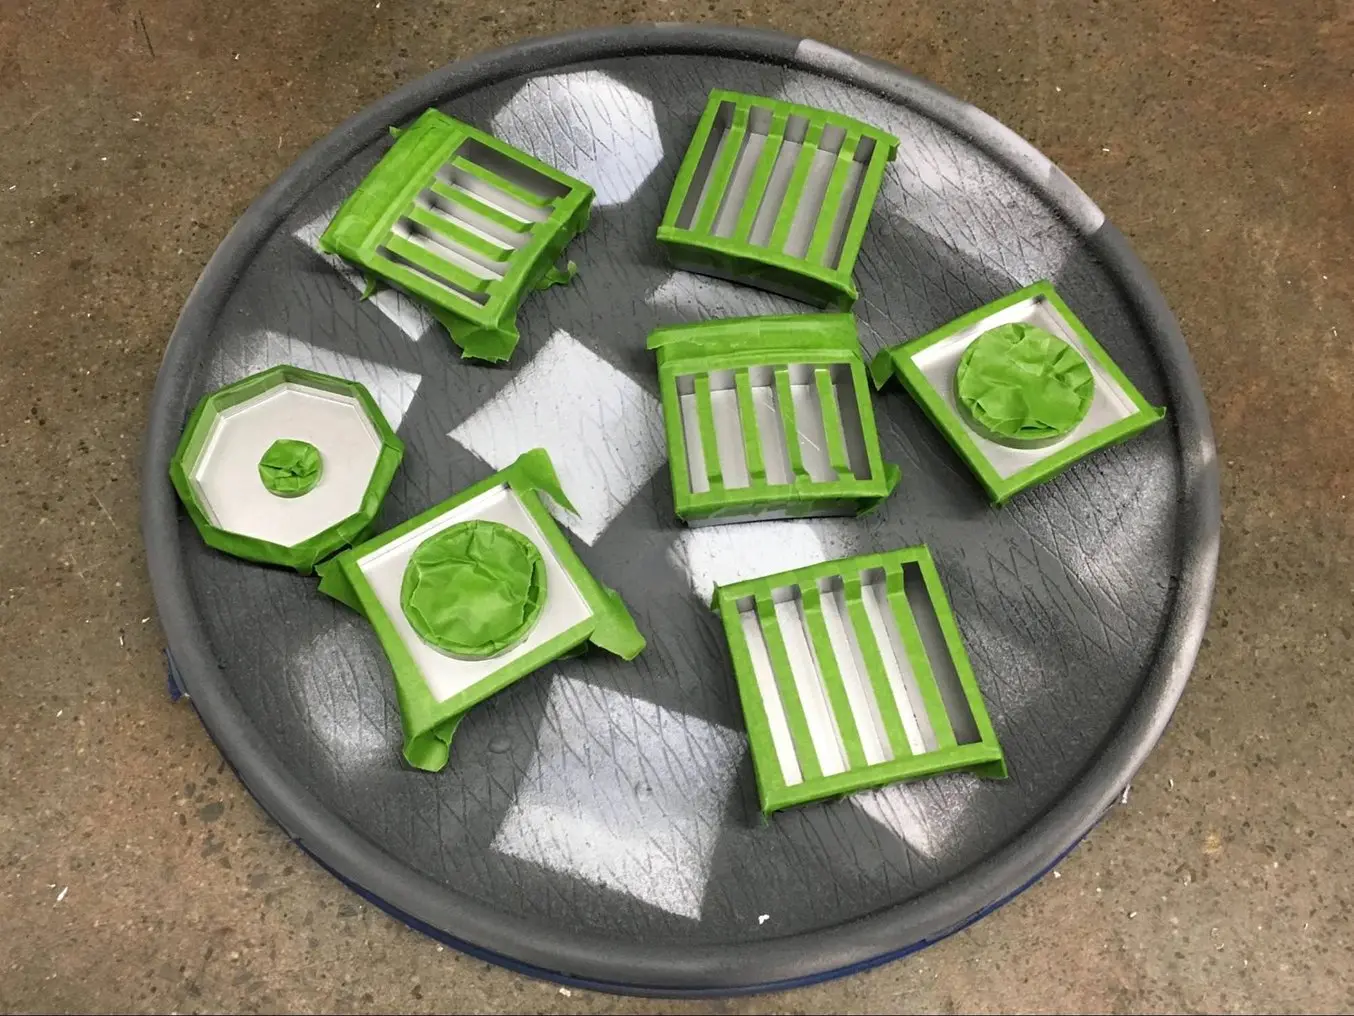
When it comes to masking, figuring out the right order is your get-go priority. In our case, the parts were get-go painted argent and the sections that would remain argent on the final role were then covered with painter's tape to hide them from the next l
Merely every bit with priming, apply several thin coats rather than one heavy coat for the best results. Most spray paints work best in warm, slightly humid, and not windy conditions, but e'er bank check the specific paint can or technical documentation for the manufacturer'due south recommendations.
Consider the time the pigment takes to dry: Allow layers sit earlier applying the same colour and allow the pigment to dry fully before applying a new color.
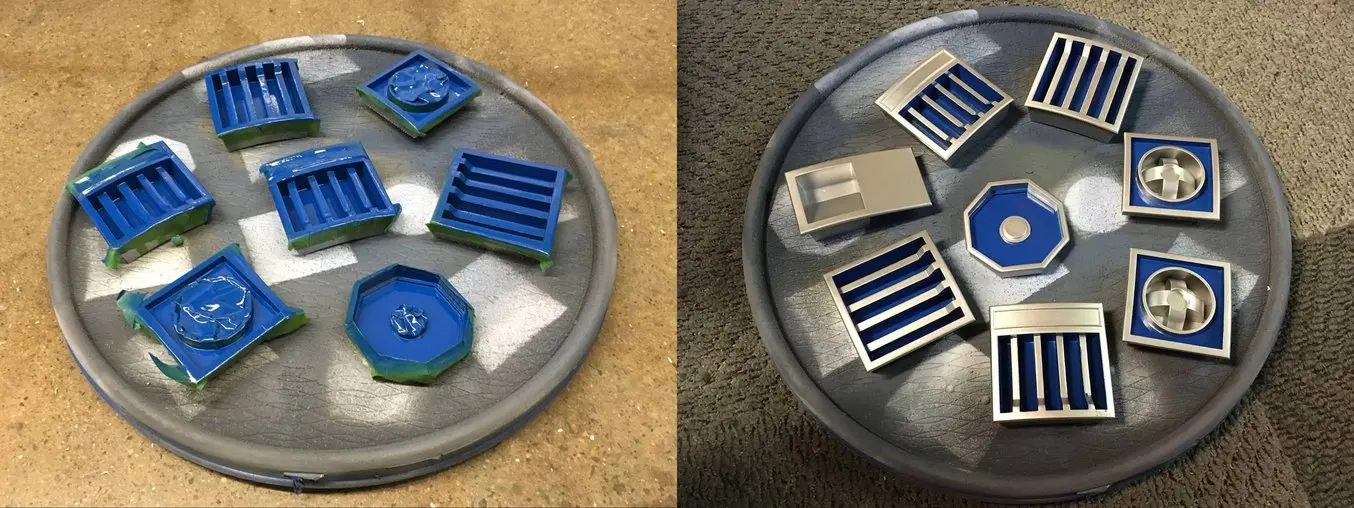
The area we covered with painter's tape remained the original silvery color after its removal.
Learn the ins and out of painting 3D printed parts in our extensive guide
Wondering how it looks when all these pieces come together?
"Excuse me sir, merely that R2-D2 is in prime number status, a existent deal."
Formlabs Optical Systems Engineer Adrian Tanner 3D printed this R2-D2 replica consisting of 105 3D printed pieces on a Formlabs SLA printer. It fifty-fifty has working electronics inside, borrowed from the Form ii — the galvo drivers to brand the sounds, the cartridge dispenser for lights, and the Z axis commuter for the dome motor.
The Form 3L large format 3D printer offers a 30 cm 10 33.v cm x 20 cm build volume for 3D printing massive industrial-quality parts.
Eliminate the turnaround fourth dimension of outsourcing or the manual work of assembly for large scale 3D prints. Now y'all can 3D print large objects in one piece with the Course 3L, the starting time affordable large format 3D printer using SLA engineering.
Curious to see how SLA parts perform? Explore our materials to learn more virtually SLA resins, and request a free sample part to experience SLA quality immediate.
Source: https://formlabs.com/blog/how-to-create-models-larger-than-your-3d-printers-build-volume/
Post a Comment for "how to draw a part for 3d printer"